TL;DR:
- A failed fire inspection can lead to fines, delays, and liability for property managers and business owners. Proper placement, maintenance, and documentation of smoke alarms in compliance with Denver and NFPA 72 codes are essential to passing inspections and ensuring safety. Standardizing alarm types and following a detailed installation and testing workflow reduce costs, improve reliability, and enhance overall fire safety management.
A failed fire inspection is more than an inconvenience. It can trigger fines, delay occupancy permits, and expose property managers and business owners to serious liability. In Denver, smoke alarm placement and installation are governed by both local ordinances and NFPA 72 (the National Fire Alarm and Signaling Code), leaving little room for guesswork. This guide walks you through the exact workflow our team at Pre Action Fire uses to deliver code-compliant installations that hold up under inspection, from placement planning through ongoing documentation.
Table of Contents
- Understand Denver smoke alarm code requirements
- Gather tools and preparation checklist
- The smoke alarm installation workflow: Step by step
- Testing, inspection, and ongoing maintenance
- What most installers overlook about multi-unit smoke alarm upgrades
- Need expert help or a comprehensive fire safety solution?
- Frequently asked questions
Key Takeaways
| Point | Details |
|---|---|
| Placement matters | Install alarms in all bedrooms, outside sleeping areas, and every level to meet Denver code. |
| Preparation is key | Having the right tools and a location plan prevents costly installation mistakes and delays. |
| Follow a proven workflow | Mark, mount, connect, and test alarms in order to ensure every device passes inspection. |
| Ongoing maintenance | Test alarms monthly, change batteries yearly, and inspect bi-annually for top compliance and safety. |
| Upgrade for efficiency | Standardizing on interconnected or 10-year sealed battery alarms streamlines upkeep and protects tenants. |
Understand Denver smoke alarm code requirements
Before a single drill bit touches the ceiling, you need a clear picture of where alarms must go and why. Non-compliant placement is the most common reason properties fail their initial fire inspections, and it is also the easiest problem to prevent.
Per NFPA 72 and Denver Fire Department requirements, smoke alarms must be installed inside every bedroom, outside each sleeping area, and on every level of the home, including basements. That means a two-story home with a finished basement requires a minimum of one alarm per bedroom, one in each hallway or area outside bedrooms, plus one on the main floor and one in the basement.
For new construction and major renovations, the rules are stricter. New construction requires hardwired interconnected alarms with battery backup, ensuring that if one alarm sounds, every alarm in the building sounds simultaneously. Every alarm must also be replaced at least every 10 years, regardless of brand or apparent condition.
Common areas inspectors flag during field reviews:
- Basements that have been finished or converted after the original build
- Room additions or accessory dwelling units added without permit
- Garages with living spaces above them (alarms required in the living area, not the garage itself)
- Hallways longer than 30 feet that have no midpoint alarm
- Properties where alarms were never updated after a remodel
Proper notification devices complement smoke alarms. Reviewing Denver notification device guidelines for your building type ensures strobe lights and audible devices meet ADA and local requirements as well. Properties with larger footprints or commercial tenants should also review Denver fire alarm compliance standards that extend beyond residential codes.
| Requirement | Residential | New Construction |
|---|---|---|
| Placement inside bedrooms | Required | Required |
| Placement outside sleeping areas | Required | Required |
| Every building level including basement | Required | Required |
| Hardwired with battery backup | Not always required | Required |
| Interconnected system | Recommended | Required |
| Replacement interval | Every 10 years | Every 10 years |
Statistic to note: The U.S. Fire Administration reports that three out of five home fire deaths occur in properties with no working smoke alarms, reinforcing why placement and replacement schedules are treated as non-negotiable in Denver code enforcement.
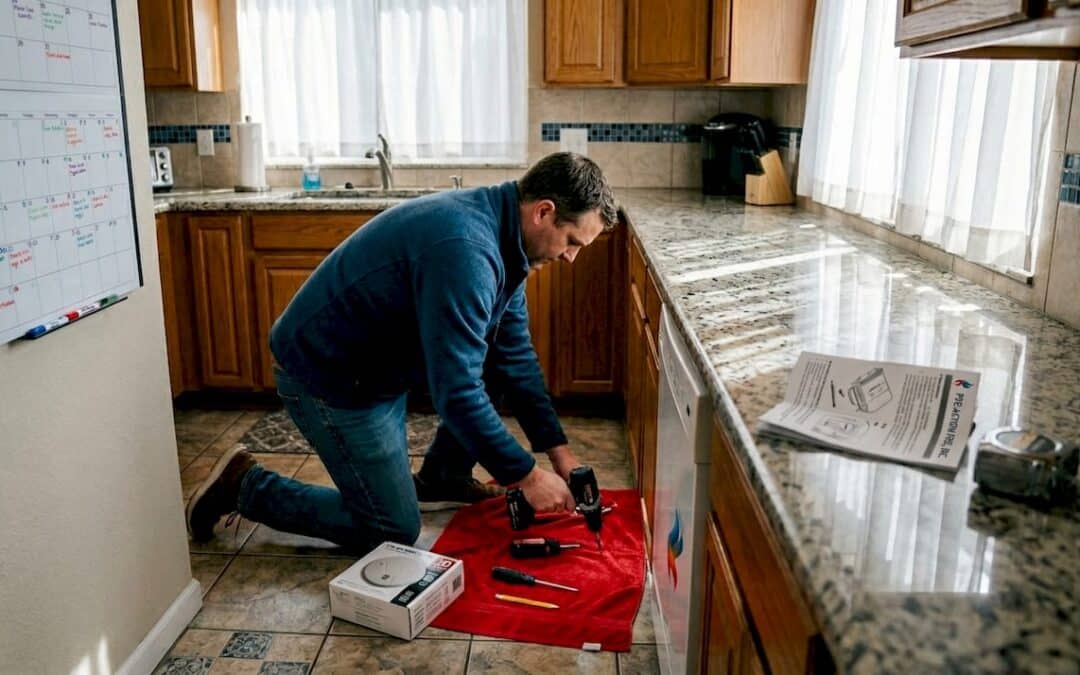
Gather tools and preparation checklist
With requirements clear, you can avoid delays by prepping the right tools and a complete checklist before visiting any property. Missing a single item mid-installation creates costly return trips and can push back tenant move-in or inspection dates.
Tools and materials required:
- Power drill with appropriate bit set (wood, drywall, masonry)
- Stud finder and pencil for marking
- Mounting brackets and screws (often included with alarms)
- Wire strippers and voltage tester (for hardwired installations)
- Ladder rated for the ceiling height
- Smoke alarms rated for the specific area type (photoelectric, ionization, or combination)
- Electrical tape and wire connectors
- Printed site plan or floor plan with planned alarm locations marked
Site preparation steps:
Before drilling, verify the power source at each planned location. For hardwired installations, confirm circuit breaker access and map which breaker controls which area. Check the ceiling and wall material so you use the right anchor type. Concrete and masonry require plastic anchors; drywall may need toggle bolts if you are not hitting a stud.
Keep alarms at least 10 feet from cooking appliances. This is a code requirement, not a suggestion. Kitchens generate grease vapor and heat that trigger false alarms constantly. The installation workflow your team should follow consistently: plan locations per code, mark and drill the mounting bracket location, secure the bracket, attach the alarm, connect power (battery or hardwire), test the alarm, and for interconnected systems, verify that all units in the building sound together.
| Installation type | Recommended alarm type | Notes |
|---|---|---|
| Single family retrofit | 10-year sealed battery | No wiring needed, easiest for retrofits |
| New construction | Hardwired with battery backup | Required by Denver code |
| Multi-unit commercial | Hardwired interconnected | All units sound simultaneously |
| Areas near kitchens | Photoelectric or heat detector | Reduces nuisance alarms |
Refer to Denver alarm regulation details if you are working with older buildings where original wiring may not support hardwired interconnection without significant upgrades.
Pro Tip: If you manage a portfolio of rental properties, audit every unit before ordering equipment. Standardizing to 10-year sealed battery alarms for retrofits eliminates the annual battery change callback, reduces tenant complaints, and cuts your maintenance overhead significantly. Many managers discover they have three or four different alarm brands across a single building, which complicates testing and replacement scheduling.
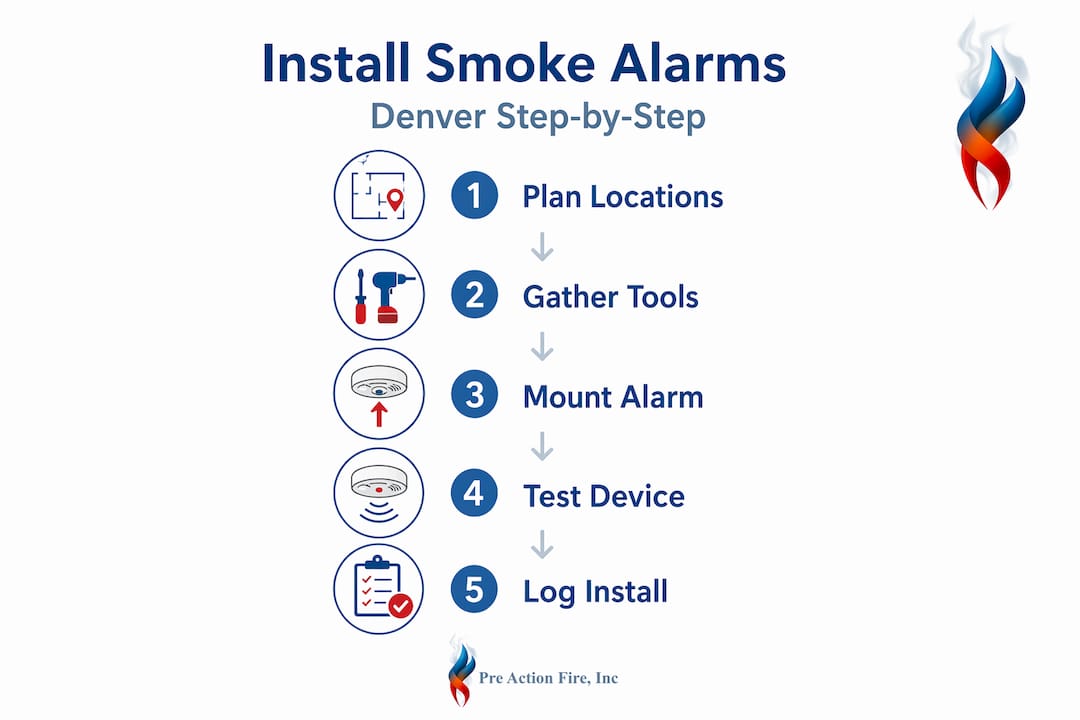
The smoke alarm installation workflow: Step by step
Once your materials are ready, follow this step-by-step workflow for reliable, code-compliant installations that minimize rework.
- Mark all locations on your floor plan first. Walk the property with the code checklist and mark every required location before touching a tool. This bird’s eye view prevents duplicate placements and catches gaps.
- Transfer marks to the ceiling or wall. Use a pencil and tape measure to mark the exact mounting point on the surface. Confirm the spot is away from air vents, ceiling fans, and windows.
- Drill and install the mounting bracket. Use the appropriate bit and anchor for the surface material. The bracket should be flush and secure with no wobble.
- Connect wiring (for hardwired units). Turn off the breaker first. Use a voltage tester to confirm power is off, then connect line, neutral, and interconnect wires per manufacturer specs and Denver fire alarm compliance requirements.
- Attach the alarm to the bracket. Most units twist-lock onto the bracket. Confirm it clicks or seats fully.
- Restore power and test immediately. Press and hold the test button until the alarm sounds. For battery units, install fresh batteries before testing.
- For interconnected systems, trigger all units. Sound one alarm and walk the building to confirm every connected unit activates. This step is critical for multi-unit properties.
Safety warning: Never install smoke alarms directly in garages, unfinished crawl spaces, or within 3 feet of cooking appliances. These environments create constant false alarms and will cause tenants to disable or remove the alarm entirely, a dangerous outcome that also exposes you to liability.
Per First Alert installation guidance, mount smoke alarms on ceilings or high on walls between 4 and 12 inches from the ceiling for wall-mounted units, and at least 10 feet from cooking appliances to prevent nuisance trips.
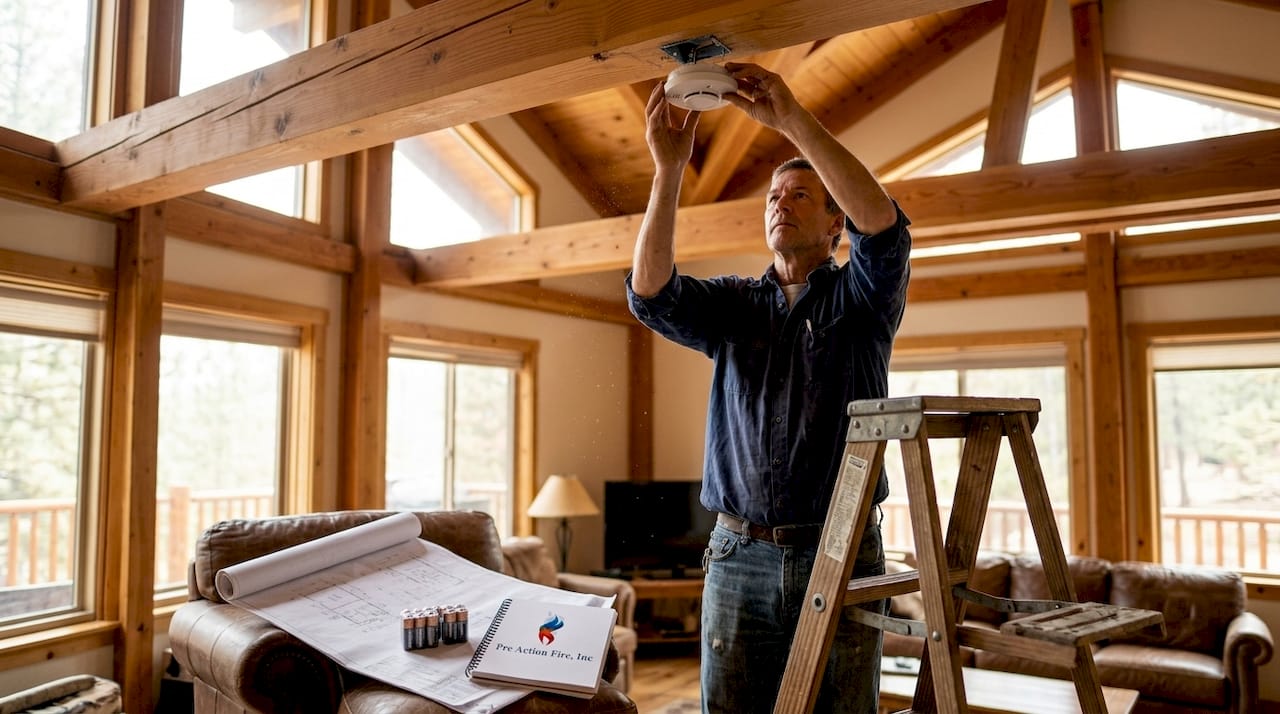
Handling common site challenges:
Pitched or vaulted ceilings require placement within 3 feet of the peak, as smoke rises and collects at the highest point. Avoid placement within 3 feet of the peak on steeply pitched gable ends, where dead air can slow detection. Near windows or exterior vents, airflow can dilute smoke concentration before an alarm triggers, so move the unit at least 3 feet away from these features. For spaces near kitchens where a standard smoke alarm would nuisance-alarm constantly, heat detectors are a code-approved alternative, as detailed in installing and maintaining smoke alarms.
| Alarm type | Best use case | Limitation |
|---|---|---|
| Ionization | Fast-flaming fires | Higher false alarm rate near kitchens |
| Photoelectric | Slow, smoldering fires | Slower response to fast-flame fires |
| Combination (dual-sensor) | General use, multi-unit | Higher upfront cost |
| Heat detector | Near kitchens or garages | Does not detect smoke, only heat rise |
Pro Tip: For multi-unit commercial or apartment buildings, prioritize interconnected or smart-enabled alarms that allow system-wide testing from a single point. This dramatically reduces the labor cost of monthly testing and simplifies your compliance documentation.
Testing, inspection, and ongoing maintenance
With installation complete, here is how to verify every unit is ready on day one and for years to come.
Day-of installation verification:
- Press and hold the test button on each unit until the alarm sounds loudly (minimum 85 decibels at 10 feet).
- For interconnected systems, trigger one unit and walk every room to confirm all alarms activate simultaneously.
- Log each alarm’s location, serial number, installation date, and test result in your compliance records.
- Confirm that notification devices (strobes, horns) linked to the fire alarm panel also activate during testing.
Ongoing maintenance schedule:
- Monthly: Press the test button on every alarm. This takes seconds per unit and confirms battery and sensor function.
- Every 6 months: Conduct a full visual inspection. Check for dust, debris, or insect nesting that can block sensor chambers. Clean units with a vacuum brush attachment.
- Annually: Replace batteries in non-sealed units. Even 10-year sealed alarms benefit from an annual function check logged against your records.
- Every 10 years: Replace every alarm unit entirely, regardless of condition.
Property managers should test monthly, batteries annually, and inspect bi-annually, with installation benchmarks averaging $10 to $50 per unit depending on alarm type and labor. Budgeting for replacement on a rolling 10-year schedule prevents the scenario where an entire portfolio of alarms ages out simultaneously.
Documentation for compliance audits:
Maintain a spreadsheet or property management software log that records each alarm’s location, model, serial number, installation date, last test date, and next replacement date. During a Denver fire inspection, an inspector may ask for this documentation. Having it ready eliminates delays and demonstrates proactive compliance management.
Connecting your smoke alarm records to the annual fire inspection process ensures your documentation aligns with what inspectors expect to see. If your building uses a central fire alarm panel, pair your smoke alarm logs with your fire alarm control panel guide records. When an alarm chirps or malfunctions, having a clear fire alarm troubleshooting reference reduces downtime and prevents unauthorized alarm removal.
What most installers overlook about multi-unit smoke alarm upgrades
Here is the uncomfortable truth: many Denver property managers treat smoke alarm upgrades as a reactive task, something they handle after a failed inspection or tenant complaint. That approach almost always costs more in the long run.
Before starting any upgrade project, audit your entire property portfolio first. Walk every unit, document every alarm’s age, brand, and type, and build a master replacement schedule. Managers who skip this step often discover mid-project that half their alarms need hardwiring they did not budget for, or that a building’s original wiring cannot support interconnection without a panel upgrade.
Standardizing on one alarm model across your portfolio is a decision that pays back for years. When every unit uses the same 10-year sealed battery model or the same interconnected smart system, your maintenance crew stops carrying four different alarm types and a bag of random batteries. Callbacks drop. Inspection failures drop. Tenant complaints about nuisance alarms drop.
The photoelectric versus ionization debate matters more than most managers realize. Ionization alarms detect fast-flaming fires faster, but they also false-alarm near cooking steam and toast. Photoelectric alarms respond better to slow, smoldering fires. The best solution for most multi-unit buildings is a combination (dual-sensor) alarm in sleeping areas and hallways, with heat detectors near kitchens. Relying entirely on one sensor type leaves gaps in coverage that will eventually show up on an inspection report.
The real cost of ignoring edge cases is not just a failed inspection. It is the tenant who disables an alarm because it false-alarms every time they cook, and the liability exposure that follows. Reviewing life safety systems for Colorado properties gives property managers a broader view of how smoke alarms fit into an integrated safety strategy that holds up under both inspections and real emergencies.
Need expert help or a comprehensive fire safety solution?
Managing smoke alarm compliance across a Denver property portfolio is a significant operational responsibility. Getting it right the first time saves you from failed inspections, emergency replacements, and the liability that follows non-compliance.
Pre Action Fire has delivered end-to-end fire alarm installation, inspection, and compliance services across the Denver Metro Area since 2009. Our NICET-certified technicians handle everything from initial placement planning through final documentation, working with property managers and business owners on both new construction and retrofit upgrades. We offer free consultations and compliance audits to help you identify gaps before an inspector does. Whether you need Denver fire alarm systems designed and installed, or want to upgrade your existing fire alarm notification devices to meet current code, our team is ready to build a solution that fits your building type, timeline, and budget. Contact Pre Action Fire today to schedule your free consultation.
Frequently asked questions
Where are smoke alarms required for Denver rental properties?
Denver mandates smoke alarms inside every bedroom, outside each sleeping area, and on every level of the home including basements, per NFPA 72 and local requirements.
How often should property managers test and inspect smoke alarms?
Test alarms monthly, change batteries annually, and conduct full visual inspections every six months to maintain compliance and catch malfunctions before inspections.
How close can smoke alarms be to kitchens?
Alarms should be installed at least 10 feet from cooking appliances; for areas closer than that, heat detectors are a code-approved alternative to prevent constant false alarms.
What is the lifespan of a smoke alarm?
Every smoke alarm must be replaced every 10 years at minimum, regardless of brand, model, or whether the unit appears to be functioning normally.
Should I use interconnected or standalone smoke alarms?
Interconnected systems activate all alarms simultaneously across the building, making them the right choice for multi-unit properties where a fire in one unit needs to alert all occupants immediately.