
A sprinkler hydrostatic test validates piping integrity by holding water pressure at a pressure level specified by NFPA 13, typically around 200 psi or above the system’s normal working pressure where applicable, for a duration of two hours. Owners face this requirement after new installations, major modifications, underground piping work, or additions affecting a significant number of sprinklers. NFPA 13 sets the installation benchmark, while NFPA 25 governs how existing systems get inspected and tested going forward.
TL;DR:
- A hydrostatic test must hold water pressure at 200 psi or 50 psi above working pressure (if above 150 psi) for two hours, with gauges read at the system’s lowest point.
- Testing is mandatory for all new systems, major modifications affecting over 20 sprinklers, underground piping, and fire department connection changes, but not for minor repairs.
- Preparation involves five-day notice, proper isolation, correct gauge calibration, and visual inspection, ensuring a smooth test and valid results.
- Common failures include overpressure damage, incorrect media use, uncalibrated gauges, and not allowing pressure stabilization before the two-hour hold.
- Owners should require complete documentation, including signed forms, calibration certificates, and photos, and avoid scheduling delays by early AHJ communication.
Table of Contents
- What Codes Govern the Sprinkler Hydrostatic Test?
- When Does Your System Actually Need a Hydrostatic Test?
- How Do You Prepare a System for Hydrostatic Testing?
- What Are the Steps in a Hydrostatic Testing Procedure?
- What Commonly Goes Wrong During a Hydrostatic Test?
- What Documentation Does the AHJ Require After Testing?
- What Field-Level Practices Separate a Good Test From a Rushed One?
- Why Proper Test Planning Saves Owners Money and Headaches
- How Preactionfire Handles Hydrostatic Testing and AHJ Coordination
- Sources
What Codes Govern the Sprinkler Hydrostatic Test?
NFPA 13 is the controlling document for newly installed or altered sprinkler piping, and it requires holding the pressure specified by the standard for two hours, generally around 200 psi or 50 psi above the system’s maximum working pressure when that pressure exceeds approximately 150 psi. The gauge reading has to come from the system’s lowest elevation point, since that’s where hydrostatic pressure peaks and where a marginal joint is most likely to show its weakness first. A passing test means no visible leakage and no significant unexplained drop on the gauge over the full holding period.
NFPA 25 plays a different role. It governs ongoing inspection, testing, and maintenance of systems already in service, and it draws a firm line: routine annual or periodic testing of existing piping does not typically require a full hydrostatic retest. Instead, NFPA 25 calls for functional checks such as flow tests and alarm verification. A hydrostatic test under NFPA 25 is usually triggered by new work, a major repair, or an AHJ directive, rather than by routine scheduling.
Local adoption complicates the picture more than most owners expect. Colorado municipalities and fire districts adopt NFPA editions on their own timelines and may have local amendments affecting notice periods or documentation requirements, with witness notification periods varying by jurisdiction. Before scheduling, confirm which NFPA edition your Authority Having Jurisdiction (AHJ) has adopted and whether any local amendments apply.
Key code provisions to keep in front of your contractor:
- Standard hold: 200 psi for two hours on all new and modified sprinkler piping.
- High-pressure exception: 50 psi above working pressure where system pressure exceeds 150 psi.
- Gauge placement: read at the system’s lowest point, not at the riser.
- Underground piping: subject to its own hydrostatic requirements under NFPA 13, separate from aboveground rules.
- Scope distinction: NFPA 25 handles ongoing functional testing; NFPA 13 governs the hydrostatic acceptance test itself.
The practical takeaway is this: a hydrostatic test is a construction acceptance test, not a recurring maintenance chore. NFPA 13 frames it as verification that the pipe and fittings can hold pressure, not proof that the sprinkler heads will activate correctly under fire conditions. Confusing the two is one of the most common owner misunderstandings, and it’s worth revisiting the difference between piping-strength tests and functional readiness checks before signing off on any test as “complete.”
When Does Your System Actually Need a Hydrostatic Test?
Not every sprinkler project triggers a full hydrostatic test, and knowing the difference saves you from paying for testing you don’t need, or worse, skipping testing you do.
- New construction. Every new sprinkler system installation requires acceptance testing under NFPA 13 before the system goes into service. This is non-negotiable and applies regardless of building size.
- Additions or modifications affecting more than 20 sprinklers. Smaller changes may only require testing of the isolated new section, provided the contractor can properly valve off the existing system. Larger additions typically require testing the new work at full hydrostatic pressure before tying it into the live system.
- Underground piping. Underground fire main installations carry their own hydrostatic testing requirements, often performed before backfill, since access becomes far harder once the trench closes.
- Fire department connection (FDC) changes. Any alteration to the FDC or the piping feeding it generally requires a fresh hydrostatic test on that section.
- Repairs versus major modifications. A minor repair, like replacing a single sprinkler head, usually doesn’t require a hydrostatic retest. Replacing a section of main or repiping a zone does.
- Standpipes. Standpipe systems follow parallel but distinct rules, including five year acceptance testing parameters that mirror sprinkler hydrostatic logic. If your building has both, don’t assume one test covers the other.
- AHJ discretion. Local fire officials can require hydrostatic testing beyond NFPA’s explicit triggers, particularly after water damage events, suspected freeze damage, or when system history raises red flags.
If you’re planning a system upgrade or expansion, working through how piping layout affects isolation and testing scope before construction starts avoids surprises when the contractor tells you the whole system needs pressurizing instead of just the new branch line.
How Do You Prepare a System for Hydrostatic Testing?
Preparation determines whether your test goes smoothly or turns into a half-day troubleshooting session. Contractors need lead time, and owners need to know what “ready” actually looks like.
Notice and scheduling come first. Many jurisdictions and institutional owners, including a documented University of Maryland leak-test procedure, require five business days’ advance notice before a witnessed test. That notice period lets the AHJ or an owner’s representative arrange attendance, which matters because an unwitnessed test often gets rejected outright.
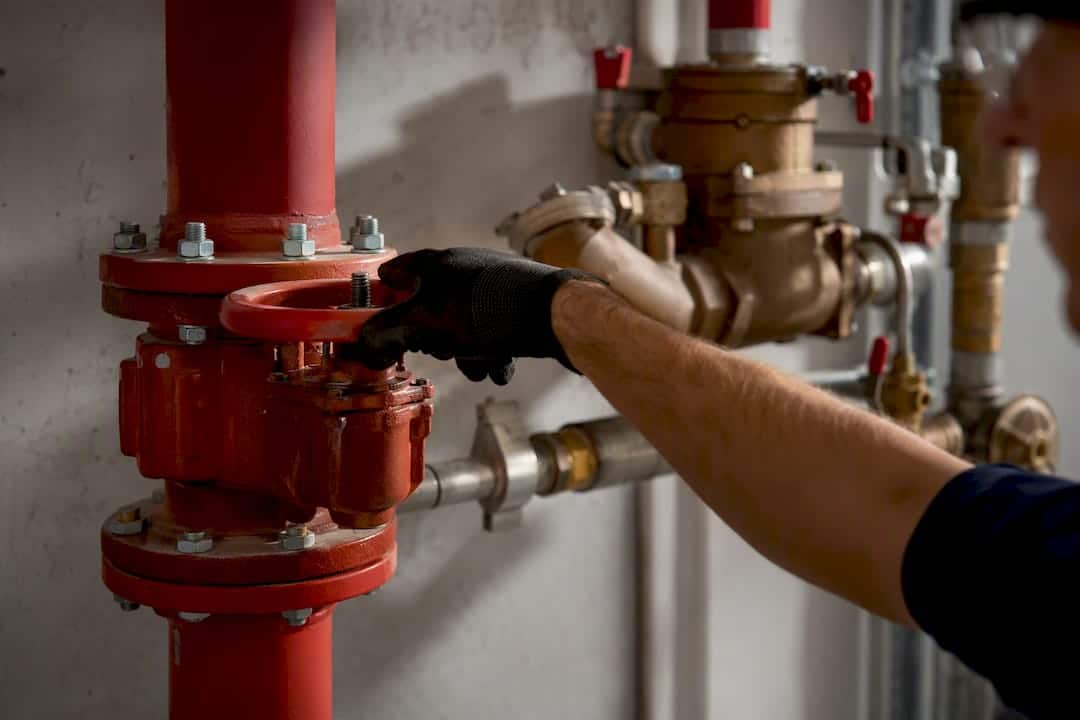
Isolation strategy matters just as much. The contractor has to valve off the section under test from the rest of the live system, and backflow preventers need particular attention since they’re rated for specific pressure ranges and can be damaged if test pressure runs through them unintentionally. Any equipment not rated for test pressure, including certain valves, gauges, or specialty devices, needs to be isolated or removed before pressurization begins.
Equipment specifications aren’t optional details. Gauges need to match the pressure range being tested, with appropriate increments so a reader can actually see a 5 psi shift rather than guessing between marks on a dial. Calibration records matter too: a gauge more than five years old without documented calibration is a red flag many AHJs will flag on sight. For gaseous piping systems adjacent to wet sprinkler mains, oil-free compressors or nitrogen are the accepted media, never compressed air contaminated with lubricant.
Before the crew loads clock time into the hold, do a pretest visual inspection: check joints, hangers, and fittings for obvious installation defects. Catching a loose coupling before pressurization is far cheaper than catching it during a 200 psi hold in front of an inspector.
Preparation checklist for owners to confirm with their contractor:
- Written notice sent to the AHJ or witness at least five business days ahead.
- Isolation valves identified and backflow preventers protected or bypassed appropriately.
- Gauges sized to the correct range with visible increments and current calibration documentation.
- Pump or nitrogen source confirmed and appropriate for the piping material being tested.
- Visual walkthrough completed to catch obvious defects before pressurization.
Pro Tip: Ask your contractor for gauge calibration certificates before the test date, not after. A gauge without documented calibration inside the last five years is one of the fastest ways to get a passing test thrown out during AHJ review.
What Are the Steps in a Hydrostatic Testing Procedure?
The procedure itself follows a fixed sequence, and skipping steps or rushing the stabilization phase is where most avoidable failures happen.
- Isolate the test section. Close valves separating the piping under test from the rest of the live system. Remove or plug any devices not rated for test pressure, including certain sprinkler heads if specified by the contractor’s plan.
- Fill slowly and bleed air. Water fills the piping at a controlled rate while air vents are opened at high points to release trapped air. Trapped air compresses under pressure and can produce false readings, so this step doesn’t get rushed.
- Wait for pressure stabilization. Practitioners record the initial pressure only after all visible air is bled and the reading holds steady. Starting the two-hour clock before the system stabilizes is one of the most common sources of a spurious failure.
- Pressurize to the required test value. Apply pressure slowly using a hydrostatic pump until the gauge reads 200 psi, or 50 psi above working pressure where that rule applies, slow pressurization protects joints from shock loading.
- Begin the two-hour hold. Once test pressure is reached and confirmed stable, the clock starts. The technician monitors the low-point gauge continuously and performs a visual walk of all accessible piping, joints, and fittings.
- Record start and final pressures. Both readings get logged, along with the time, ambient temperature, and any observations made during the walk-through.
- Evaluate pass or fail. A test typically passes with no visible leakage and minimal pressure loss. The University of Maryland’s leak-test standard flags anything greater than a 5 psi change as a failing result, a threshold widely mirrored in municipal test specifications.
- Retest if needed. A failed test means locating and repairing the leak, then repeating the full procedure from stabilization forward. Partial retests of only the repaired joint are rarely accepted.
Pro Tip: If your contractor wants to start the hold clock the moment the gauge hits 200 psi, push back. A stabilization pause of even a few minutes catches temperature-related pressure drift that would otherwise get misread as a leak.
Cold weather adds a wrinkle worth flagging here rather than treating as an afterthought. Air testing is an accepted interim measure in freezing conditions, but it is not a substitute for the hydrostatic test. Air’s compressibility masks small leaks that water pressure exposes immediately, which means an air-tested system still owes a hydrostatic test once temperatures allow it. Budget for that follow-up test the same way you’d budget for the original one, because skipping it leaves your compliance file with an open item.
What Commonly Goes Wrong During a Hydrostatic Test?
Most test failures trace back to a short list of preventable mistakes, and knowing them ahead of time protects both your system and your schedule.
Cold-weather shortcuts cause more damage than any other single factor. Water left in piping during a hard freeze expands and can crack fittings or split pipe outright, which is exactly why air testing exists as an interim option in winter. Treating an interim air test as the final word, and skipping the hydrostatic follow-up once conditions improve, leaves an undocumented gap in your compliance record.
Overpressure damage to components rated below test pressure is the second major risk. Backflow preventers, certain control valves, and specialty devices often carry lower pressure ratings than the piping around them. A crew that fails to isolate these components before pressurizing to 200 psi can destroy equipment that costs far more to replace than the test itself would have cost to run correctly.
Prohibited test media cause damage that’s harder to spot immediately. Corrosive additives, antifreeze compounds, or brine solutions sometimes get used to prevent freezing during testing, but they attack pipe walls and fittings over time and are barred from use in hydrostatic testing for that reason.
Misread gauges round out the common failure list. A gauge read before pressure stabilizes, or a gauge with worn or miscalibrated internals, produces a false leak reading that sends a crew hunting for a leak that doesn’t exist.
- Never treat a cold-weather air test as a final substitute for the hydrostatic test.
- Isolate or remove any component rated below the test pressure before pressurizing.
- Never use additives, brine, or corrosive media in test water.
- Always confirm gauge stabilization before starting the two-hour clock.
Pro Tip: Keep a written log of ambient temperature during every test. A pressure drop that looks like a leak is sometimes just thermal contraction on a cold morning, and that log is the fastest way to tell the difference during an AHJ review.
What Documentation Does the AHJ Require After Testing?
A hydrostatic test that passes in the field but produces no paper trail is functionally worthless for compliance purposes. AHJs and insurance carriers both expect a complete record.
Standard test forms capture initial and final pressure readings, total test duration, ambient weather conditions at the time of test, the specific piping materials tested, the exact section or location covered, and signatures from both the testing technician and the witnessing party. Many institutional owners, following examples like the University of Maryland’s standardized leak-test form, upload completed forms directly into a project file or an AHJ compliance portal rather than relying on paper copies that can go missing.
Notice periods deserve the same rigor as the test itself. Confirm witness availability before locking in a date, and build in buffer time in case the AHJ requests a reschedule.
Records worth keeping on file indefinitely:
- Signed test summary form with all pressure readings and witness signatures.
- Gauge calibration certificates current within five years.
- Photos of the tested section before backfill or wall closure, especially for underground and concealed piping.
- Correspondence confirming AHJ witness scheduling and any conditions attached to approval.
These records matter well beyond the day of the test. Reviewing common documentation gaps facility managers run into before an insurance audit or a property sale can save weeks of scrambling to reconstruct a paper trail that should have existed from day one.
What Field-Level Practices Separate a Good Test From a Rushed One?
Technicians who run these tests routinely develop habits that rarely make it into code text but consistently separate a clean pass from a contested one.
A pretest checklist matters more than the test procedure itself in most cases. Before pressurization, experienced crews verify gauge calibration against a known standard, walk the isolated section for obvious defects, and confirm every isolation valve is fully seated, not just closed most of the way.
Professional deliverables tell owners a lot about the crew running the job. A signed test summary form, calibration records attached rather than promised verbally, and proactive AHJ coordination that happens before the test date rather than scrambled together the morning of are all signs of a contractor who treats hydrostatic testing as a documented process rather than a formality to check off.
Cold-weather projects call for specific mitigations: scheduling interim air tests with a firm follow-up date for the hydrostatic retest once temperatures rise, and flagging that follow-up obligation clearly in the project file so it doesn’t get forgotten once the building is occupied. Standpipe systems tied to a five-year acceptance testing cycle need similar tracking, since their testing calendar runs independently from the sprinkler system’s own schedule.
- Verify gauge calibration against a known reference before every job, not just periodically.
- Confirm isolation valves are fully seated, not just visually closed.
- Require a signed test summary and calibration documentation as standard deliverables.
- Track cold-weather interim tests with a firm retest date once conditions allow.
Why Proper Test Planning Saves Owners Money and Headaches
Scheduling is where most hydrostatic testing projects go sideways, not the technical procedure itself. Owners who lock in AHJ witness availability weeks ahead, rather than the day before, avoid the single most common delay in this process.
Budget expectations should account for a qualified crew, not the cheapest bid. A contractor with properly calibrated gauges and a disciplined stabilization process runs the test once and gets a clean result. A rushed or undertrained crew often triggers a false failure, and the cost of a second mobilization eats whatever was saved on the original quote.
None of this is paperwork for its own sake. A properly documented hydrostatic test is what stands between your building and a coverage dispute after a fire, and it’s what tells an inspector, an insurer, and ultimately the people inside your building that the piping behind the wall will do its job.
— Results
How Preactionfire Handles Hydrostatic Testing and AHJ Coordination
Technicians run hydrostatic tests following best practices described in this guide: calibrated gauges, documented stabilization, and a signed test summary designed to hold up under AHJ review. For property owners managing new installations, system additions, or post-repair testing, this generally means one crew handling isolation, pressurization, the two-hour hold, and the paperwork that follows, instead of piecing together compliance after the fact.
When you request a quote, ask specifically what’s included: gauge calibration documentation, AHJ notice and witness coordination, and a completed test summary form uploaded to your project file rather than handed over as a loose printout. Those deliverables are what separate a test that gets accepted the first time from one that gets sent back for redo. If your building has an upcoming installation, addition, or a section of piping that’s never been formally tested, request a fire protection quote and get a scope of work that spells out testing, documentation, and AHJ coordination before the crew ever shows up on site.
Sources
- NFPA 13, Standard for the Installation of Sprinkler Systems
- SECTION 211101 – LEAK TEST FIRE PROTECTION PIPING SYSTEMS (UMB example)
- Fire Sprinkler Inspection Guide (GMU example)