When an emergency forces a facility shutdown, the first move is always the same: get people safe, then kill the energy. Personnel safety comes before equipment protection, every single time, and once everyone who isn’t essential is clear, trained operators isolate electrical, mechanical, and process energy sources using pre documented lockout/tagout (LOTO) steps and valve actions assigned in advance. Everything else in a facility emergency shutoff checklist supports that one sequence: notify, evacuate, isolate, verify, document.
OSHA 29 CFR 1910.38 requires a written emergency action plan for any workplace with more than 10 employees, and that plan must spell out what happens to employees who stay behind to operate critical systems before they evacuate. Where a facility runs covered processes, OSHA’s guidance on emergency response and preparedness pushes shutdown steps into the written operating procedures themselves, not a separate binder nobody opens under pressure. NFPA guidance on fire protection systems adds another layer for facilities with sprinklers, standpipes, or suppression systems tied into the shutdown sequence.
Here’s what has to happen in the first two minutes:
- Notify and account for personnel. Sound the distinct alarm signal, activate the notification system, and get a head count moving immediately.
- Evacuate nonessential staff. Everyone without a shutdown role leaves by the nearest safe route; wardens confirm clear zones.
- Isolate critical energy sources. Pre-assigned operators execute LOTO on electrical, pneumatic, hydraulic, or process systems according to the roles they trained on, not roles improvised on the spot.
Key Takeaways
A facility emergency shutdown succeeds when personnel safety comes first, energy isolation follows a verified LOTO sequence, and every action gets documented in a system the facility actually checks.
| Point | Details |
|---|---|
| Fix critical valve labels in 30 days | Label every emergency shutoff valve with system, line ID, normal position, and last inspection date. |
| Add photos to facility maps in 30 days | Photograph each shutoff point and attach it to your site map so operators recognize it instantly. |
| Publish a printable checklist in 30 days | Adopt a phase-based checklist with signature lines and roll it out to every shift within a month. |
| Launch a drill program promptly | Run at least one drill involving outside responders and refresh LOTO training for all assigned operators. |
| Move records into a CMMS promptly | Shift documentation from paper binders into a digital system with timestamped verification fields. |
| Get a professional readiness audit | Pre Action Fire’s NICET-certified technicians can stroke-test valves and verify alarm integration during a scheduled inspection. |
Table of Contents
- What Goes on a Facility Emergency Shutoff Checklist?
- How Do You Prepare Before a Shutdown Ever Happens?
- What Does Lockout/Tagout Look Like During an Emergency Shutdown?
- Where Are Your Emergency Shutoff Valves and Can Anyone Find Them Fast?
- Who Does What When the Shutdown Actually Starts?
- How Do You Prove the Shutdown Was Done Right?
- How Do You Bring Systems Back Online Safely?
- What Training and PPE Do Shutdown Personnel Actually Need?
- What Does OSHA Actually Require in a Written Shutdown Plan?
- Why Do Paper Checklists Fail During Real Emergencies?
- What Facility Managers Get Wrong About Shutdown Readiness
- How Pre Action Fire Supports Shutdown Readiness
- Frequently Asked Questions
- Sources
What Goes on a Facility Emergency Shutoff Checklist?
A usable facility emergency shutoff checklist isn’t a wall of prose. It’s a printable, phase-based document that a stressed operator can follow without stopping to think about what comes next. The structure that works best moves through six phases: immediate actions, energy isolation and LOTO, valve actions, verification, documentation, and restart.
Each phase needs its own checkbox column, a spot for initials, and a timestamp field. Skip the initials column and you lose accountability the moment an incident review starts asking who verified what.
Below is a compact template you can adapt for a wall binder, a laminated card, or a digital form inside a computerized maintenance management system (CMMS).
| Field | Entry |
|---|---|
| Incident ID | ___________ |
| Date / Time initiated | ___________ |
| Lead responder (name/initials) | ___________ |
| Affected system(s) | ___________ |
| Shutdown phase reached | ☐ Immediate ☐ Isolation ☐ Valve ☐ Verified ☐ Documented ☐ Restarted |
Once that header block is filled in, the checklist itself runs phase by phase:
- ☐ Alarm sounded and personnel notified (time: ______)
- ☐ Nonessential staff evacuated and accounted for
- ☐ Shutdown lead confirmed on-site and roles assigned
- ☐ Electrical isolation complete, locks and tags applied (operator initials: ______)
- ☐ Process/mechanical isolation complete (operator initials: ______)
- ☐ Emergency shutoff valves closed and tagged (operator initials: ______)
- ☐ Zero-energy state verified by second responder (verifier initials: ______)
- ☐ Photos or video captured of tagged devices and gauge readings
- ☐ Incident log entered into CMMS or paper record with timestamp
- ☐ Restart authorization pending supervisor sign-off
Signature / Date: ___________________ Title: ___________________
This template borrows directly from the structure used in energy isolation checklists like EHS-F-084, which maps each energy source to a specific isolation device and verification method rather than leaving isolation as a vague instruction.
How Do You Prepare Before a Shutdown Ever Happens?
The shutdown itself is only as good as the planning that happened weeks earlier. Facilities that scramble during an actual event almost always skipped this stage.
Start with a hazard assessment tied specifically to shutdown decision points, not a generic facility risk audit. Walk the building and ask: which systems, if left running during a fire, gas leak, or structural event, create a secondary hazard? Document each one with its location, the energy type involved, and the isolation method already in place. That document becomes the backbone of your written emergency action plan.
Build a roles and contacts template well before you need it:
- Who has authority to call the shutdown (usually the facility manager or a designated safety officer)?
- Who serves as evacuation warden, and how many wardens does the floor plan actually need? OSHA’s planning guidance suggests roughly one warden per 20 employees as a starting ratio.
- Who executes each isolation step, and who is the backup if that person is off-site?
- Which external parties get notified, and in what order (local fire department, utility provider, regulatory contacts)?
Contractor coordination deserves its own line item. Any contractor working on-site needs a briefing on your site-specific shutdown procedures before their first shift, not after an incident starts. Pre Action Fire’s guidance on fire safety rules for contractors covers this handoff in more depth, and it’s worth building into your subcontractor onboarding packet permanently.
What Does Lockout/Tagout Look Like During an Emergency Shutdown?
Energy isolation is the technical core of the whole checklist, and it’s where most facilities either prove their training or expose the gaps in it. The sequence adapted for emergency conditions runs in six steps:
- Notify affected personnel that isolation is starting and which systems are involved.
- De-energize by shutting down equipment through normal controls where time allows.
- Isolate each energy source at its disconnect, valve, or breaker.
- Verify zero energy state using a meter, gauge, or physical test, never by assumption.
- Tag each isolation point with the responder’s name, time, and reason.
- Secure locks so the isolation can’t be reversed until authorized personnel remove them.
Different energy types require different isolation and verification methods, and mixing them up under stress is a common failure point:
| Energy Type | Isolation Method | Verification Step |
|---|---|---|
| Electrical | Open disconnect, lock breaker | Test with a rated meter for zero voltage |
| Pneumatic | Close supply valve, bleed lines | Confirm gauge reads zero, cycle actuator |
| Hydraulic | Close isolation valve, release pressure | Check pressure gauge at zero |
| Steam | Close block valve, open bleed/drain | Confirm no flow or pressure at drain |
| Natural gas | Close shutoff valve, cap if required | Leak-test with approved detector |
This mirrors the verification matrix structure used in standard energy isolation checklists, where every energy source gets its own confirmed status rather than a blanket “isolated” checkbox.
Pro Tip: Single isolation works for routine maintenance, but for high-risk process lines carrying steam, gas, or hazardous fluids, use double block-and-bleed: two isolation points with a bleed valve between them. If the first block fails, the second one still protects your team, and the bleed valve proves there’s no pressure trapped between them.
Where Are Your Emergency Shutoff Valves and Can Anyone Find Them Fast?
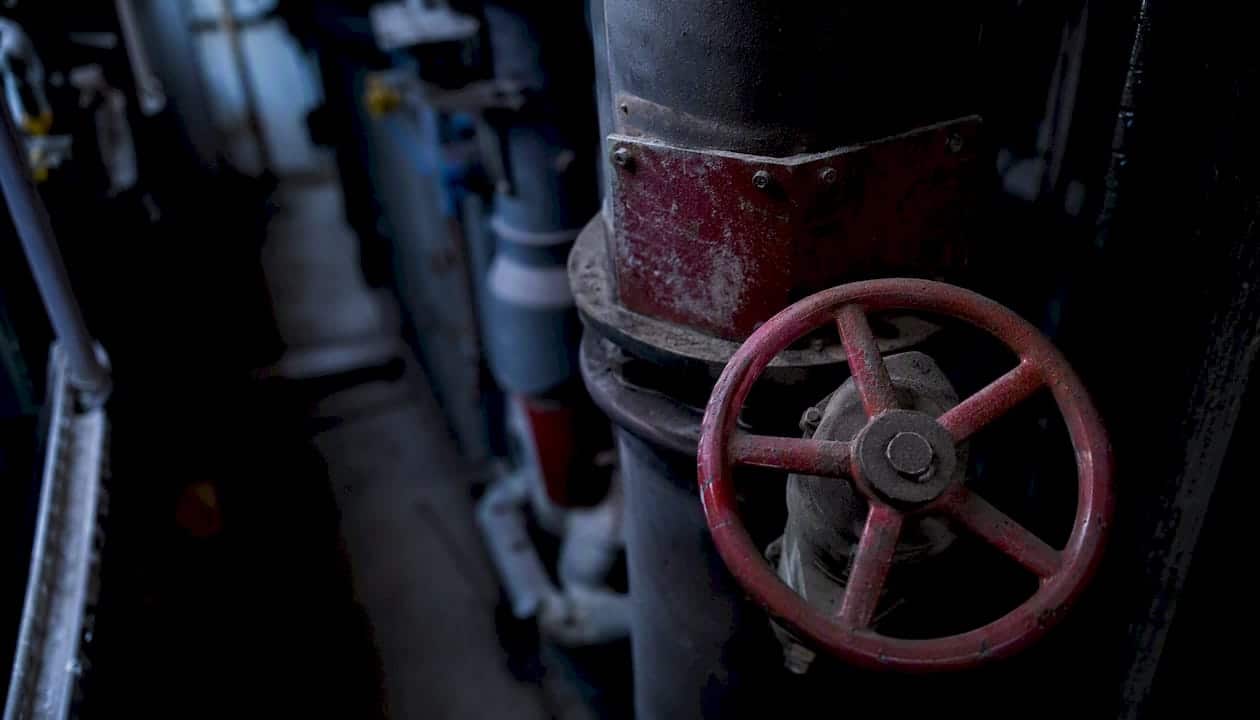
A valve nobody can locate in under 30 seconds is a valve that doesn’t function as an emergency control, no matter how well it was installed. Every emergency shutoff valve needs a label with four fields: the system it controls, a line ID that matches your facility map, its normal operating position, and the date of its last inspection. Add the override procedure directly on the tag if the valve requires a specific tool or sequence to operate.
Inspection needs to happen on a schedule, not only when someone remembers:
- Measure actual stroke time under system pressure, not just visual movement.
- Check actuator health, including air supply volume for pneumatic actuators.
- Confirm tags are legible and haven’t faded or been painted over.
- Verify physical access, no stacked pallets, no parked equipment, no locked cages without a key nearby.
- Clear any obstruction blocking the approach path, even temporary ones.
Emergency shutdown system design guidance stresses that physical validation of final elements, measured stroke time in particular, catches problems that a drawing review never will. A valve that’s supposed to close in four seconds but actually takes eleven is a finding you want during a scheduled inspection, not during an actual release.
Pro Tip: Put a photo of every shutoff valve directly on your facility map, not just a labeled dot. Under stress, people recognize a picture faster than they read a label, and a photo also shows the exact obstruction or lighting condition a text description misses.
Who Does What When the Shutdown Actually Starts?
Confusion during a live shutdown almost always traces back to unclear roles, not a lack of knowledge. Five roles cover most facilities:
- Shutdown lead makes the call to proceed, tracks phase completion, and authorizes restart.
- Valve operator executes the physical isolation of assigned valves and reports completion.
- LOTO verifier independently confirms zero-energy state, separate from whoever applied the lock.
- Evacuation warden clears assigned zones and reports headcount to the shutdown lead.
- Communications lead manages internal updates and any required external notifications.
The sequence itself follows a branching path, not a straight line. Alarm and evacuation happen first, always. From there, if the hazard is immediately life-threatening (active fire, gas release, structural failure), everyone evacuates and isolation waits for the fire department or hazmat team. If the hazard is contained and controllable, trained operators proceed with staged isolation while the evacuation continues in parallel.
Handoffs between shifts or between internal responders and outside agencies need a short sign-off: system status, phase reached, and any isolation points still pending, transferred in writing or through your CMMS, never verbally only. Pre Action Fire’s overview of evacuation plan roles breaks down warden responsibilities in more detail if you’re building this structure from scratch.
How Do You Prove the Shutdown Was Done Right?
Verification is where a facility either builds a defensible record or leaves gaps that surface during an insurance claim or OSHA inspection. Every documentation entry needs a timestamp, the verifier’s name, the instrument reading observed (voltage, pressure, flow), and photo or video reference where practical.
The minimum fields to capture in a CMMS or digital emergency response platform:
- Incident ID and initiation time
- Each isolation point, who verified it, and the reading confirmed
- Photos of tagged devices and gauge zero readings
- Completed LOTO tag numbers cross-referenced to system IDs
- Sign-off from the shutdown lead confirming all phases complete
Evidence capture matters more than most facilities budget time for. Photograph every tagged device, every gauge showing zero, and any completed LOTO tag before removing anything. Retain these records for at least as long as your incident review cycle requires, and longer if your insurer or local jurisdiction sets a specific retention window. Documentation examples for facility managers give a useful starting template if your current logs are still handwritten.
How Do You Bring Systems Back Online Safely?
Restart is not the reverse of shutdown, and treating it that way is where a surprising number of incidents happen. Re-energization needs its own gated checklist:
- Confirm all tools, materials, and personnel are clear of the work area.
- Verify every LOTO device is accounted for before any tag is removed.
- Remove tags in the reverse order they were applied, starting with the last system isolated.
- Re-energize systems one at a time, never all at once.
- Observe each system for leaks, alarms, or abnormal vibration before moving to the next.
- Confirm final sign-off from the authorized restart supervisor before returning the facility to normal operation.
- Each gate needs a named authorizer, not a group decision made informally.
- Watch specifically for pressure spikes, unusual sounds, and control system alarms during the first few minutes back online.
- Keep a monitoring log running for at least the first shift after restart, recording readings at set intervals so any drift gets caught early.
A phased return also gives your team a natural point to flag a valve that didn’t reseat properly or an actuator that hesitated, the kind of detail that gets lost if everything comes back online in a rush.
What Training and PPE Do Shutdown Personnel Actually Need?
Anyone assigned a shutdown role needs personal protective equipment matched to the specific hazard they’ll face, not a generic hard hat and safety glasses. Respiratory protection, chemical splash gear, or arc flash rated clothing depends entirely on what systems that person is isolating. Where employees are expected to remain behind to perform shutdown tasks rather than evacuate immediately, additional training under OSHA’s hazardous materials response provisions and appropriate medical surveillance become part of the program, not an optional add-on.
Training and drills need a real cadence, not a one-time onboarding session:
- Initial training for every employee assigned a shutdown role, documented with a competency sign-off.
- Annual refresher training at minimum, covering any procedure changes since the last session.
- Random, unannounced drills at least once a year that include outside responders like the local fire department, a practice OSHA’s workplace emergency guidance specifically recommends.
- Clear documentation of who completed which training and when, stored in the same system as your shutdown logs.
The most common pitfall isn’t a lack of training material. It’s treating the checklist as a paper exercise that never gets rehearsed physically. A team that has only read the LOTO steps performs noticeably worse under real time pressure than a team that has actually walked the isolation points and practiced tagging them, even once.
What Does OSHA Actually Require in a Written Shutdown Plan?
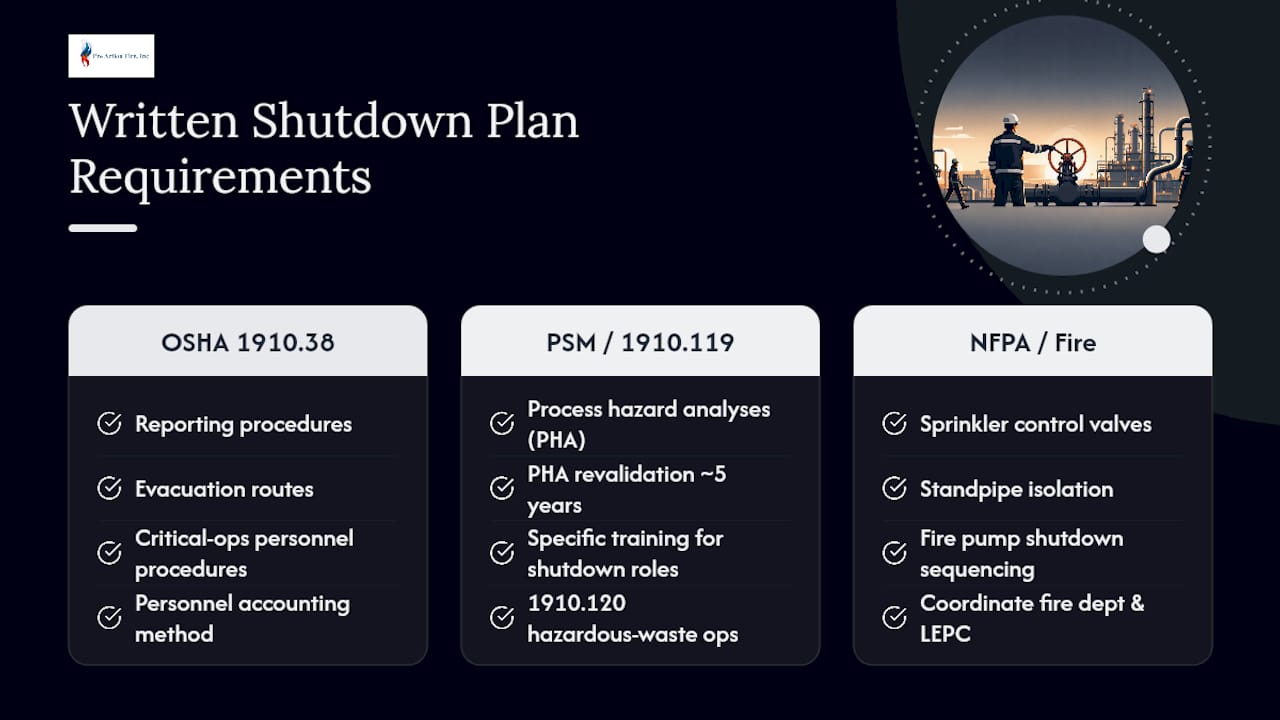
OSHA 29 CFR 1910.38 sets the floor: any facility with more than 10 employees needs a written emergency action plan covering reporting procedures, evacuation routes, procedures for employees who remain to handle critical operations, a method to account for personnel after evacuation, and named contacts for questions about the plan.
Facilities running covered processes face additional requirements. Process Safety Management provisions under 1910.119, along with hazardous waste operations rules under 1910.120, bring in process hazard analyses that need revalidation roughly every five years, and they require specific training for anyone performing shutdown or emergency response duties tied to those processes.
OSHA data indicates written emergency action plans must include procedures for employees who remain to operate critical equipment before evacuating, a requirement facilities with more than 10 employees cannot satisfy verbally.
NFPA standards layer on top of this for fire protection systems specifically, covering sprinkler control valves, standpipe isolation, and fire pump shutdown sequencing. When a shutdown involves fire suppression equipment, coordinate with your local fire department and, where applicable, the Local Emergency Planning Committee (LEPC). Notify regulators after an incident when the event meets reportable thresholds under your state’s environmental or OSHA recordkeeping rules, not automatically for every shutdown drill.
This section provides general regulatory information and isn’t a substitute for legal or compliance advice specific to your facility. Confirm current requirements with OSHA or a qualified compliance professional before finalizing your written plan.
Why Do Paper Checklists Fail During Real Emergencies?
Static paper binders fail for a predictable reason: nobody updates them after the third valve gets relocated during a renovation, and the binder sits in an office that might be the evacuated zone. Facilities that integrate their shutdown checklist into a CMMS or a dedicated emergency response platform get two advantages a binder can’t offer: real-time status tracking during the event and an automatic timestamped record afterward.
Field-proven practices that consistently separate facilities with strong shutdown readiness from the rest:
- Physically validate final elements during every inspection cycle, not just during commissioning. A valve that closed correctly two years ago can develop a sticking actuator or a corroded stem without any visual warning.
- Measure actual valve stroke time under real system pressure, since a valve that closes slowly under test conditions closes even slower under emergency load.
- Photograph every shutoff point directly on the site map rather than relying on a written location description.
- Check actuator air supply volume during inspections; a pneumatic actuator that’s fine on paper can fail if the compressor feeding it has degraded output.
Pro Tip: Build a short “known failure points” list inside your CMMS for each valve, documenting past issues like a stuck stem or slow actuator response. When that valve comes up for its next inspection, whoever’s assigned already knows exactly what to check first instead of starting from zero.
What Facility Managers Get Wrong About Shutdown Readiness
The conventional advice on emergency shutdowns treats the checklist itself as the deliverable. Write the document, file it, check the compliance box. That’s backwards. The checklist is only proof that the real work happened: valves that actually stroke in the time they’re rated for, operators who’ve physically practiced tagging the isolation points they’re assigned, and a communication chain that doesn’t depend on one person’s cell phone working.
What gets underestimated most is how much a facility’s readiness depends on physical verification rather than documentation quality. A beautifully formatted LOTO procedure means nothing if the valve behind door 14 has been blocked by a pallet jack for six months, or if nobody’s tested that the pneumatic actuator on the third floor still has adequate air supply. Paper compliance and operational readiness are not the same thing, and treating them as interchangeable is where facilities get exposed, usually during the exact moment they can least afford it.
If there’s one place to put disproportionate effort, it’s inspection rigor on final elements, the valves, actuators, and disconnects that actually do the isolating. Everything upstream of that (the plan, the roles, the training schedule) exists to support those physical devices working correctly on the first try, under pressure, without a second attempt.
How Pre Action Fire Supports Shutdown Readiness
A facility emergency shutoff checklist is only as strong as the systems behind it, and that’s where a fire protection partner earns its place. Pre Action Fire has worked with commercial and industrial facilities across the Denver Metro Area since 2009, and shutdown readiness overlaps directly with the services already on our schedule: mapping and labeling emergency shutoff valves, integrating fire alarm systems with your notification protocols, testing final elements like sprinkler control valves and fire pumps during scheduled inspections, and helping facilities move shutdown records into a trackable digital system instead of a binder nobody updates.
If you’re evaluating a vendor for a shutdown readiness audit, ask three questions upfront: do they physically stroke-test valves rather than just checking them visually, do they document findings in a format your CMMS can ingest, and are their technicians NICET-certified for the systems they’re inspecting? Those three answers tell you more than a sales brochure ever will.
Our NICET-certified technicians handle exactly this kind of audit for fire alarm, sprinkler, and suppression systems throughout the Denver area. If your shutoff valve map hasn’t been reviewed in the last year, or your fire alarm integration hasn’t been tested against your current shutdown sequence, request an on-site inspection and get a documented starting point before your next drill.
Frequently Asked Questions
What is the first step in a facility emergency shutoff checklist?
The first step is always personnel safety: sound the alarm, notify staff, and evacuate anyone without an assigned shutdown role before energy isolation begins.
How often should emergency shutdown drills happen?
At least annually, with random unannounced drills that include outside responders like your local fire department, per OSHA’s workplace emergency guidance.
Does every facility need a written emergency action plan?
Any workplace with more than 10 employees needs one under OSHA 29 CFR 1910.38; smaller facilities can communicate the plan verbally but should still document roles.
What’s the difference between single isolation and double block-and-bleed?
Single isolation closes one valve to stop energy flow; double block-and-bleed uses two valves with a bleed point between them, giving a backup if the first valve fails and confirming no trapped pressure remains.
How long should shutdown documentation be retained?
Retain records at least as long as your incident review cycle and insurance requirements specify, and keep photos, verification readings, and completed LOTO tags together in one system rather than scattered across paper and digital logs.
Sources
Save these locations directly in your emergency binder and cross-reference them in your CMMS so anyone reviewing the plan can verify the underlying regulatory language without hunting for it.
- 1910.38 – Emergency action plans. | Occupational Safety and Health Administration
- Energy isolation checklist (EHS-F-084) — NCIFrederick